Difference Between Illustrations and Painting
So what is the difference between a painting and an illustration?
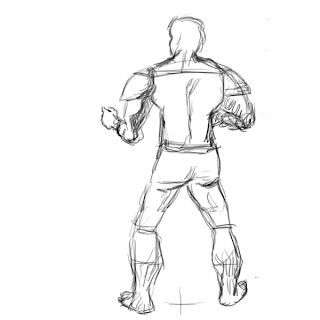
From observation, an illustration is about great looking line work. It is the first thing you will notice.
Meanwhile, paintings are about edge designs and gradations.
Types of Block-in
Posted by Temujin in Composition, Painting on Tuesday, March 20, 2012
I learned a couple of painting techniques today.
Type of Block-ins
1. Value
2. Complementary
3. Color
4. Lights and Shadows
5. Direct
This is from the book "Capturing the Seasons in Oil". It is a pretty good book. Buy it.
Another book that I think is worth buying is "Watercolor Success!: 52 Essential Lessons for Creating Great Paintings"
In this book I learned about painting forms first then add the textures later. Its author also talks about design elements with respect to painting composition.
More on Texturing
Another lesson I learned today, from my thinking, during my long walk this afternoon. I think it is better to learned painting buy studying traditional painters rather than digital painters.
Digital painters use a lot shortcuts like textured brushes or textured layers. This isn't necessarily bad if you know what you are doing.
But if you are just learning, you might use this tools or shortcuts randomly. Just experimenting until you arrive at something that you think is good.
But if you go the traditional route, you will have to think, how did the old traditional painters achieve textures just by using ordinary brushes.
There is no overlay layer in traditional painting. You cannot also load a custom image to use as a brush. So it is evident that they painted this textures manually - using brushwork techniques, a knife, a sponge, or spray.
After learning how they do it manually, you will have a better appreciation of digital textures.
You will also find that you don't really need a lot of texture images. You will find yourself using just a few to help you achieve the effects you want.
13 March 2012 Sketch
Posted by Temujin in Doodles on Tuesday, March 13, 2012
The character, the clouds, and the sky were originally painted with Paint Tool Sai.
You can do this piece using Gimp. It is just that Sai has better blending brushes.
Blending modes is actually Gimp's weakness. It is very limited. If you want to achieve the effects that could be done in other painting software you would have to work harder.
Using Achromatic Painting Technique for Creating Anime Art
Posted by Temujin in Painting on Sunday, March 4, 2012
T-Shirt Design: Making Money with Digital Illustrations
Posted by Temujin in Shirt Design on Saturday, March 3, 2012
And you can also check my other print designs at Cafepress.com/2DPoetry.
A few of the things we could do to earn with our drawings are:
1. Take on commission jobs.
2. Sell illustrations in microstock websites
3. Sell shirt designs
Character Design Using Silhouettes
Posted by Temujin in Character Design, Sketching on Monday, November 21, 2011
 | |
| First Christmas Silhouettes |
It is important to create a very recognizable silhouette or outline. A perfect example is Mickey Mouse. When you see his shadow you instantly recognize who he is.
Aside from that there are also several Advantages to Drawing Using Silhouettes :
1. I have already mentioned Recognizable Character
2. You won't get bogged down by details - During the early stages of Character Design details is not important.
3. You won't get bogged down by technicalities - don't put to much emphasis on perfect anatomy, proportion. Don't thick about textures at this time or the exact components of a costume.
4. You get Practiced Seeing Shapes - Many real world objects a very complex. In order to draw them properly it is a good skill to be able to simplify them into basic shapes and then add the details later on.
A Reason for Blogging
Posted by Temujin in Character Design, Sketching on Sunday, November 20, 2011
First Lesson on Character Design
Yesterday, I was checking books at National Bookstore. I was looking at the way some authors teach about creating characters. Usually they start with a stick figure. And then they add volume to the character by using boxes and cylinders. And then they add the details. And finally, you get your finished drawing which is normally what people admire.
But I thought, this is not the proper way to design your character. The first step in character design should be, to just let yourself doodle. Let your right brain (your creative side) roam free. Just doodle searching for a good design. Don't think too much about proportion, anatomical correctness, and perspective. Because if you stop and dwell on these things at the start, you are basically letting your left brain( your analytical side) take over thus killing the creative process.
Anatomy, proportion, perspective, and foreshortening are also important. But not at the very beginning.
Know your character and the design first. Then use your knowledge of them to polish your design.


